How to Photograph the Yokohama Skyline in Winter
Yokohama offers a stunning skyline during the cold months. You can capture crisp images of Minato Mirai in 2026. This guide explains how to photograph the Yokohama skyline in winter easily. The dry air provides perfect visibility for night shots.
Choose the Best Time for Skyline Photos
To plan your trip, review Yokohama travel info.
For current hours, prices, and announcements, start with Yokohama travel info.
Winter air in Japan is very clear. This clarity makes your skyline photos look sharp. Aim for the blue hour just after sunset. The city lights glow beautifully against the deep blue sky.In 2026, sunset in Yokohama occurs around 4:45 PM. Arrive at your chosen spot by 4:00 PM. This gives you time to set up your gear. You can capture the changing light as day turns to night.
The city lights usually turn on at dusk. The Cosmo Clock 21 Ferris wheel looks best when fully lit. Check the Yokohama Convention & Visitors Bureau for local event times. Early evening offers the best balance of light.
Wait for a clear day after a cold front. These days offer the best visibility of Mount Fuji. You might even capture the mountain behind the city. This creates a classic Japanese winter scene.
Essential Gear for Winter Night Photography
A sturdy tripod is vital for long exposures. Winter winds at the harbor can be quite strong. A heavy tripod keeps your camera steady during slow shutter speeds. This prevents blurry images in your final shots.
Use a wide-angle lens to capture the whole scene. A 16mm or 24mm lens works well for panoramas. Bring extra batteries because the cold drains them fast. Keep spare batteries in your pocket to stay warm.
Check this best camera gear for winter photography in Yokohama list for more tips. A remote shutter release is also very helpful. It prevents camera shake when you take the picture. This ensures your skyline details remain tack sharp.
Consider using a lens hood to block stray light. Nearby street lamps can cause unwanted flare in your photos. A clean microfiber cloth is also essential for wiping moisture. Keep your glass clear for the best results.
Top Locations for Yokohama Skyline Views
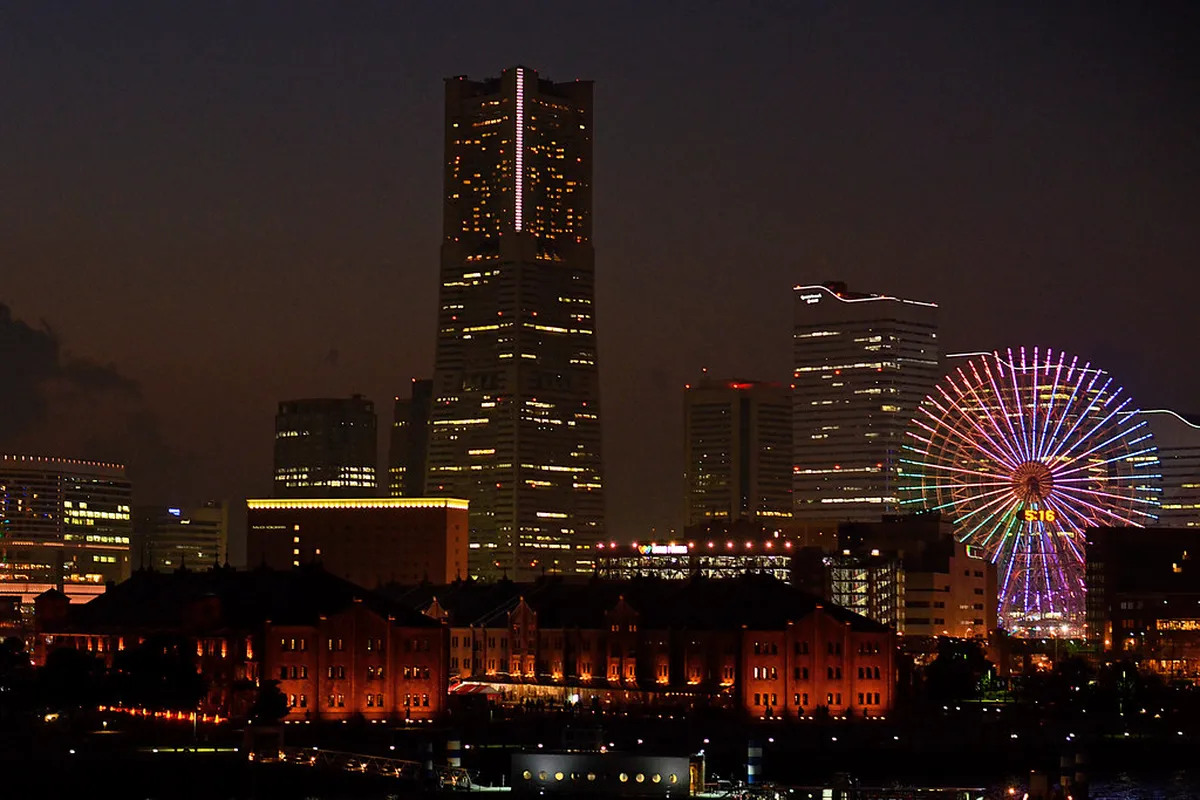
Osanbashi Pier offers the best panoramic views. You can see the Landmark Tower and the Cosmo Clock 21. The wooden deck provides a great foreground for your images. It is free to enter and open 24 hours.
Visit the Sky Garden at Landmark Tower for a high angle. This observation deck sits on the 69th floor. It costs about 1,000 yen for adults to enter. These are top Yokohama winter photography spots for any skill level.
Hammerhead Park is another excellent location for 2026. It offers a closer view of the InterContinental Hotel. The park is less crowded than other popular spots. You can find unique angles of the harbor here.
Kishine Park provides a different perspective of the city. It is further away but offers a quiet environment. You can use a telephoto lens to compress the buildings. This makes the skyline look dense and impressive.
Camera Settings for Crisp Winter Shots
Set your camera to a low ISO like 100. This reduces digital noise in the dark sky areas. Use a small aperture between f/8 and f/11. This range ensures the entire skyline stays in focus.
A shutter speed of 10 to 30 seconds works well. Longer exposures make the water look smooth and glassy. It also creates beautiful light trails from passing boats. Experiment with different speeds to find your favorite look.
Manual focus is often better for night photography. Use the live view screen to zoom in on a bright light. Turn the focus ring until the light is a tiny dot. This ensures your focus is perfect every time.
Shoot in RAW format for the best editing flexibility. RAW files capture more detail in the shadows and highlights. You can adjust the white balance easily during post-processing. This helps you get the perfect blue hour tones.
Dealing with Cold Weather Challenges
Wear warm layers and gloves with touch-sensitive fingertips. The temperature near the water drops quickly at night. Staying warm helps you stay patient for the best light. Comfortable photographers take better pictures.
Keep your camera in a bag when moving between temperatures. This prevents condensation from forming on your lens. Let the gear warm up slowly when you go inside. This protects the internal electronics from moisture damage.
Use hand warmers to keep your fingers nimble. You can also tape a warmer to your battery compartment. This trick helps the battery last longer in freezing air. It is a simple way to extend your shoot.
Check the best tripod spots for Yokohama illumination photography 2026 for safety. Some areas may have restrictions on tripod use. Always be respectful of other tourists and pedestrians. Follow local rules to ensure a great experience.
Frequently Asked Questions
When is the best time for winter photos in Yokohama?
The best time is during the blue hour in December or January. This occurs about 20 minutes after sunset. The sky turns deep blue while city lights glow brightly. It provides the perfect contrast for skyline photography.
Do I need a tripod for skyline shots?
Yes, a tripod is essential for night photography. You will use long shutter speeds to capture enough light. Holding the camera by hand will result in blurry images. A tripod ensures your photos stay sharp and professional.
Where is the best view of the Ferris wheel?
Osanbashi Pier offers the most iconic view of the Ferris wheel. You can frame it alongside the Landmark Tower. This location provides a wide, unobstructed view of the entire Minato Mirai area. It is perfect for wide-angle shots.
Capturing the Yokohama skyline is a rewarding 2026 winter activity. Use these tips to get professional results. Explore more night photography tips for Yokohama winter light shows to improve your skills. Happy shooting in the beautiful city of Yokohama!